Jira integration
Assign tickets to agents, track work from ticket to done.
Awk agents work with Jira Cloud to pick up tickets, track progress, and transition statuses automatically.
Connecting Jira
In the console's Integrations step, install the Awk Jira app on your Jira Cloud site (this needs a Jira site admin), authorise with Atlassian, and select which projects the agents can see.
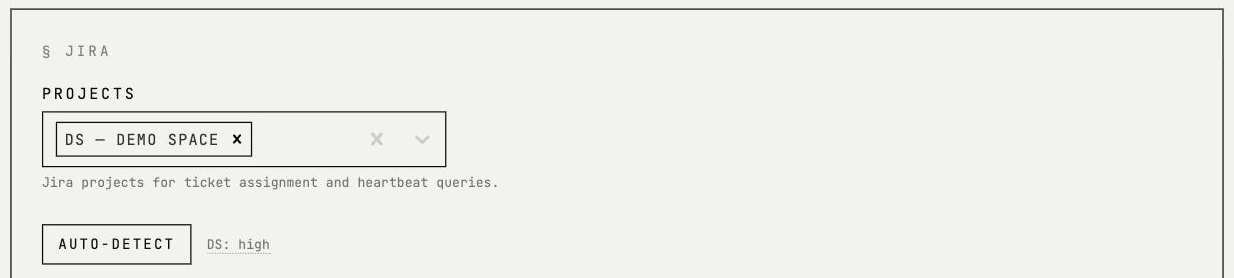
Jira Server and Data Center are not currently supported.
Assigning tickets to agents
There are three ways to tell an agent to pick up a Jira ticket.
Method 1: Custom field
Add a single-choice select field called Awk Assignee to your Jira project.
Company-managed projects:
- →Go to Jira settings → Issues → Custom fields and click Create custom field
- →Choose Select List (single choice), name it
Awk Assignee, and add the optionsOGandQA - →Add the field to your project's issue screens
Team-managed projects:
- →Go to Project settings → Issue types and pick the issue type
- →Add a Dropdown field named
Awk Assigneewith the optionsOGandQA
To assign a ticket, set the field to the agent name:
| Field value | Agent |
|---|---|
OG | OG picks up the ticket |
QA | QA checks the build and reviews the PR against the ticket |
The ticket also needs to be in one of the trigger statuses you map in the console (see Status transitions) — agents only pick up tickets from those statuses.
This is the recommended method for teams that want structured, automated assignment.
Method 2: Labels
Add a label to the Jira ticket:
| Label | Agent |
|---|---|
awk:og | OG picks up the ticket |
awk:qa | QA checks the build and reviews the PR against the ticket |
Labels are simpler to set up but less structured. Use this method if you don't want to add custom fields to your project.
Method 3: Ask in Slack
You can also tell an agent to pick up a specific ticket directly:
@OG-Awk pick up PROJ-318
The agent reads the ticket and starts working.
What happens next
When OG picks up a ticket:
- →Reads the ticket description and acceptance criteria
- →Opens a Slack thread to confirm requirements with the reporter
- →Writes code in a new branch
- →Runs tests and iterates until green
- →Opens a pull request on GitHub
- →Transitions the Jira ticket to In Review
- →Hands off to QA to check the build against the ticket and review the code
QA checks the build does what the ticket asked and reviews the diff. If it finds issues — the build doesn't meet the requirement, a regression, a security risk — it sends the PR back to OG with comments. OG fixes and resubmits. When QA approves, it readies the merge — you approve it in Slack — and the ticket moves to Done.
Status transitions
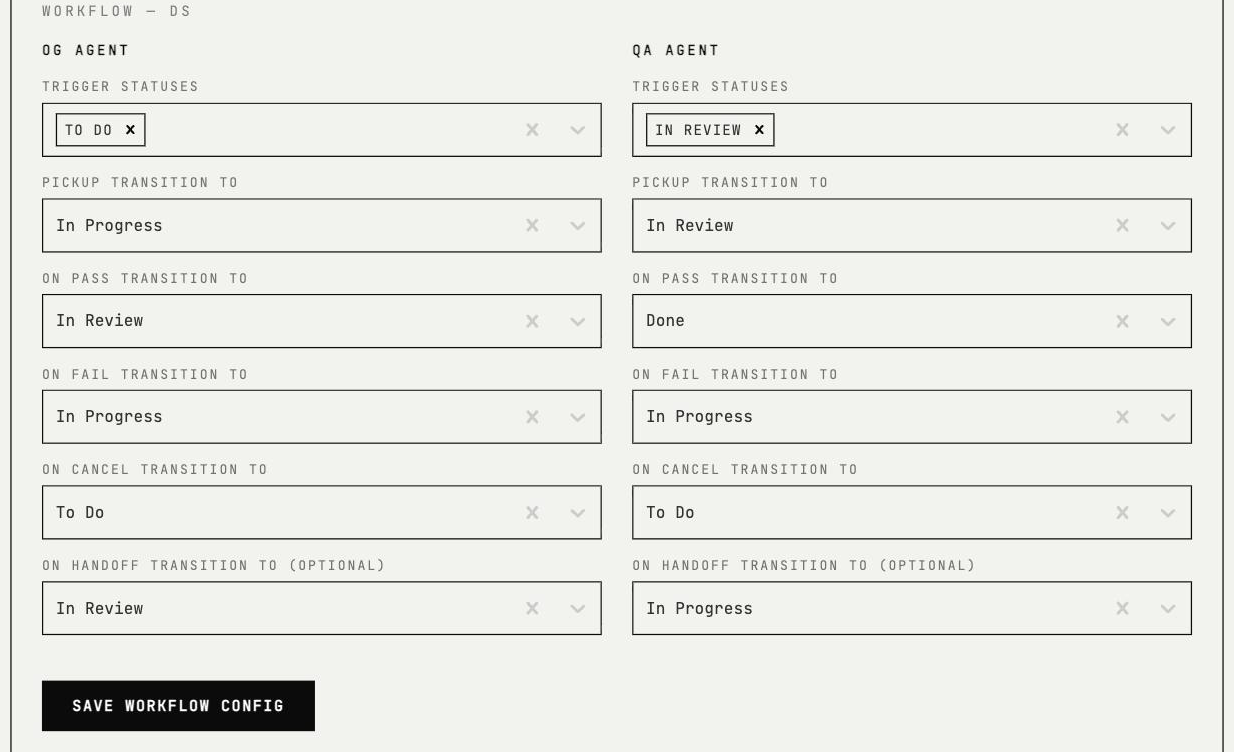
Agents use standard Jira statuses:
| Status | Meaning |
|---|---|
| To Do | Ticket is waiting to be picked up |
| In Progress | OG is actively working on it |
| In Review | QA is reviewing the pull request |
| Done | QA passed the build — merging the PR still needs your approval |
Your Jira workflow needs these statuses (or equivalents) with transitions between them.
You map each transition per agent in the console — the status a ticket moves to on pickup, on pass, on fail, on cancel, and on handoff — so the agents drive your board exactly the way your team already works.
Tips for better results
- →Write clear acceptance criteria — the more specific, the better OG's first attempt will be
- →Link relevant code — mention file paths, modules, or existing patterns in the ticket description
- →Specify the branch — if you want work done on a specific branch, say so in the ticket
- →One feature per ticket — agents work best on focused, well-scoped tickets